Custom leaves for Vue trees
This tutorial shows how to use the Digarts Jungle DVD products to make custom tree branches materials for Vue. This is a first step in making your own trees.
What you will need to complete this tutorial
A version of Vue that has the plant editor (Esprit with Botanica or above).
A freebie version of Digarts textures available here.
Photoshop or another image editing software.
Starting up in Photoshop
We will only use two items from the file you downloaded at Digarts. Both are located in the Photoshop Layers directory. Open them in Photoshop:
- Trunk & Limb Layers.psd
- Tropics (big tree leaves).psd
We will use them to build a tree branch similar to the ones used in Vue.
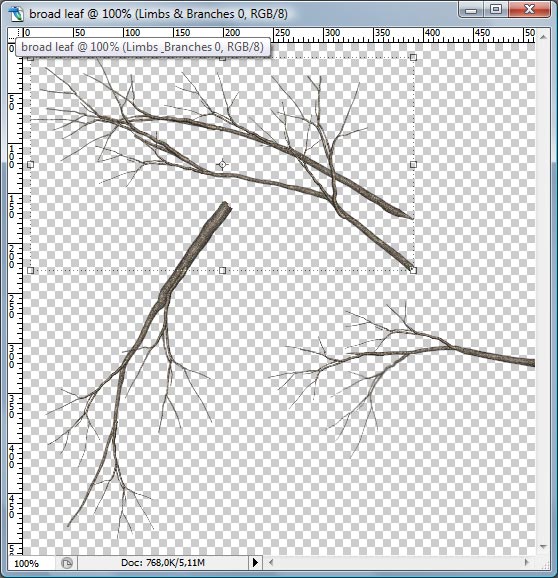
In Photoshop, create a 512 by 512 pixels image with a transparent background. Drag 3 or 4 or the branch layers from the Trunk & Limb Layers.psd file. I used the ones on the Limbs and branches layer of the file.
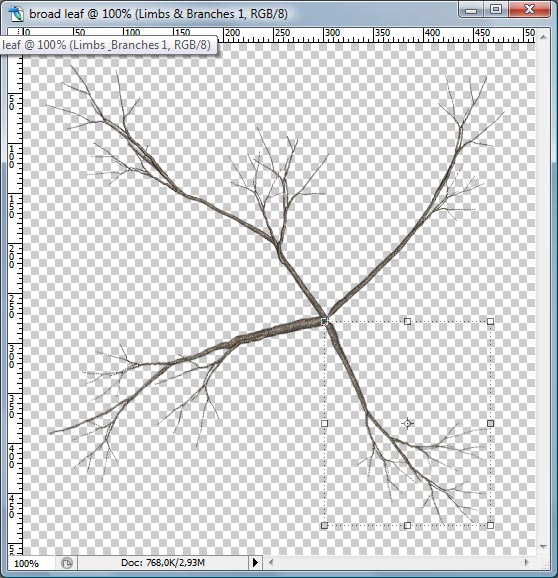
Using CTRL+T (or Apple+T on a Mac) move and resize the branches to arrange them in a shape similar to this one. Make them join in the center.

There will probably a small hole in the area where the branches join. Use the clone stamp tool with a small brush size (less than 10) to fill it.
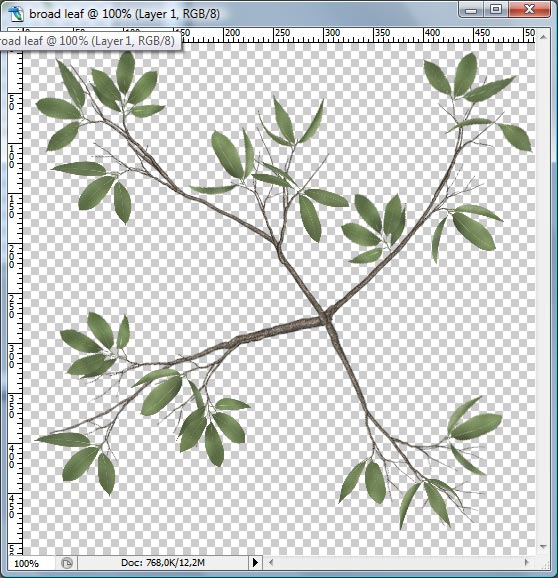
Now drag some leaf layers from the Tropics (big tree leaves).psd file onto the branches one. Arrange them so that they join the branches. As Vue makes rather dense trees, I spaced the leaves a bit along rather long branches.
Once you are satisfied with your layout, save the file as a .psd to keep the layers and modify it later if needed.
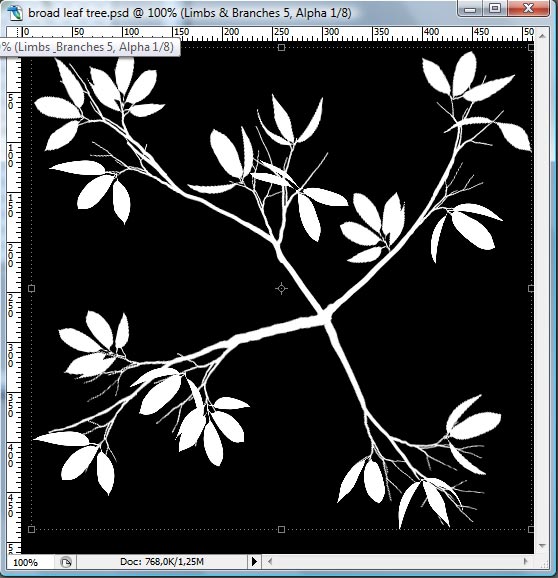
Flatten the image. CTRL click (or Apple+click) the only layer remaining to create a selection. Go to the channels and create a new channel with the selection. Save the file as a tiff.
Working in Vue
Create a tree in your scene to test your texture. The one I used is the rural maple tree from the default Vue trees.
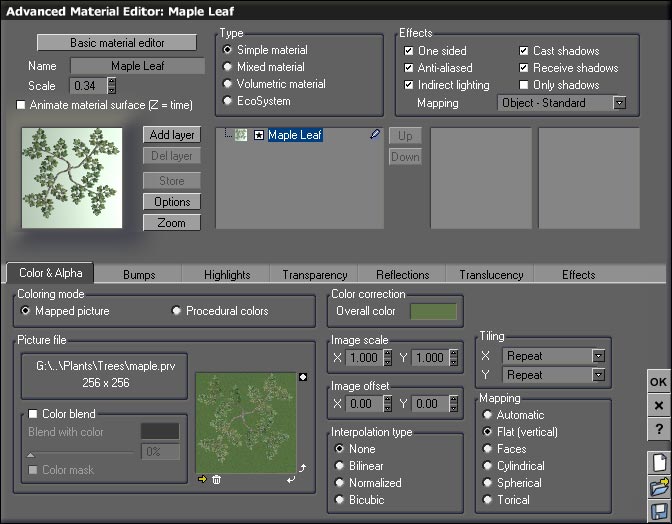
CTRL+E to open the plant editor. You will see the Maple leaf texture on the right of the window. This is the one we will edit.
Right click it and select "edit material". In the Color & Alpha tab, click the small arrow below the image and select the tiff file you have created. You will see a prompt: The picture contains alpha information. Would you like to use it as a material transparency ? Click yes.
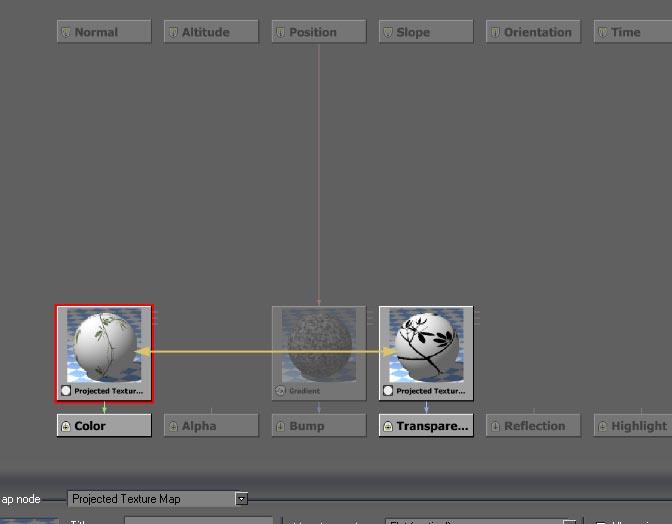
Now you should have a nice texture, but it is not ready to use. The mapping of the transparency does not match the one of the color layer. I suspect this a bug, but it is easily corrected. Right click the texture map and choose Edit function.
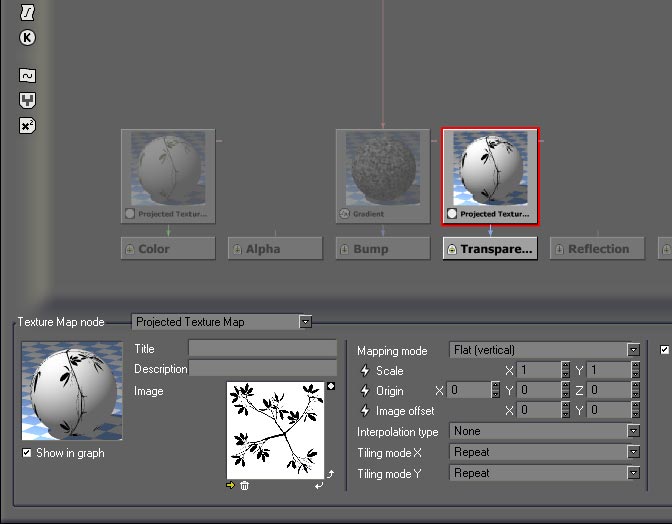
Click the transparency map and change its mapping mode from automatic to Flat (vertical). Delete the bump map function as we will not use it there. You can create a custom one from the texture map.
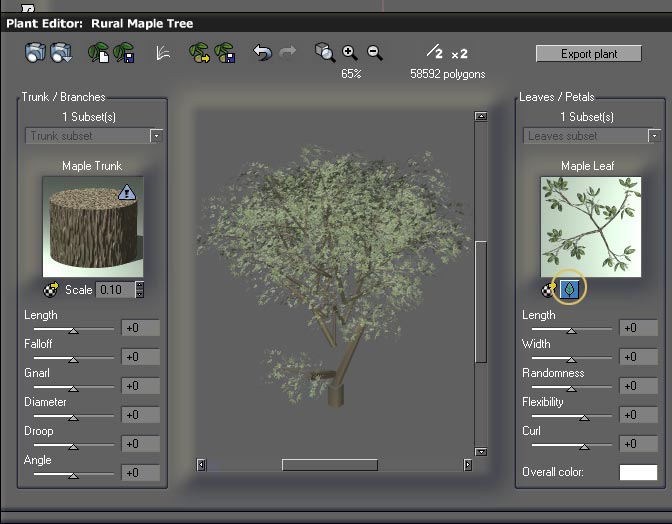
Go back to the plant editor. Now you have a nice tree with custom branches and leaves. It is nearly finished. Click the small leaf underneath the texture thumbnail to open the leaf editor.
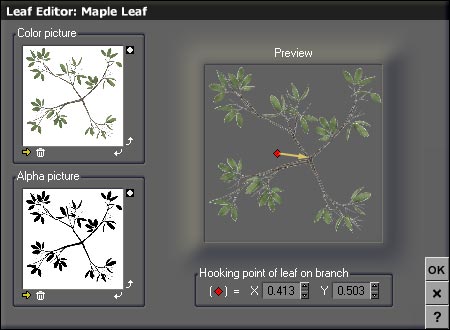
Move the small red dot to the junction of the branches.
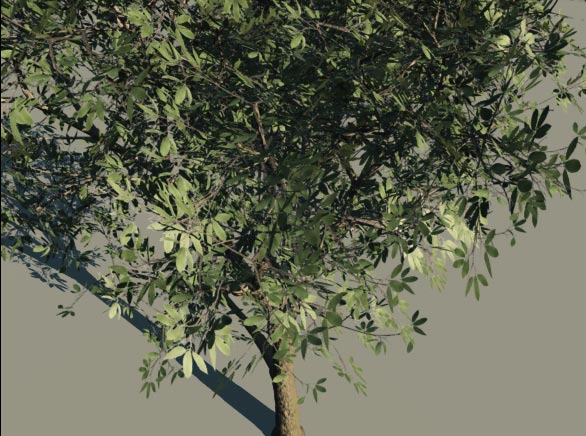
Here is a test render I made with the new texture. Looks good. The higher resolution texture will enable closer vues.
I have used this technique with just a small sample of what Digarts offers. The Jungle DVD for Photoshop has very high resolution files for more than 45 different plants and items including japanese maple, bougainvillea, apple tree with flowers, etc. Reeds, grass and grain textures can be used in Vue just as easily. Only a few items cannot be used this way. The advantages of these textures is their high resolution and the fact that they are all on transparent background.