Geocontrol 2 Vue - part 1
This is the first part of a tutorial showing how to use Geocontrol 2 terrains in Vue. It will show you how to export the terrain from Geocontrol and import it back into Vue.
What you will need to complete this tutorial
- A copy of Vue 6 or more
- Geocontrol 2 beta and terrain settings: alps-valley.gts
- A working knowledge of Geocontrol 2.
If you do now have (yet) Geocontrol 2 (it is only available to registered users of Geocontrol 1), you will still be able to complete the tutorial as I have included the exported files that will enable you to make your terrain: alps-valley.zip (beware, the file is 10Mb)
Exporting the terrain from Geocontrol
If you have Geocontrol 2, you can load the alps valley terrain settings and work from it.
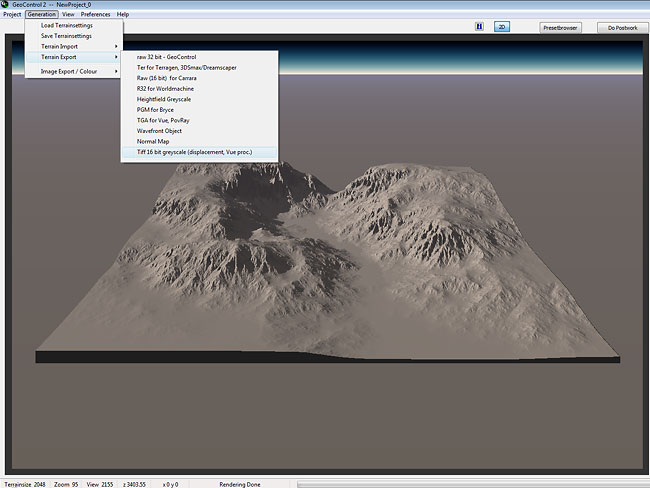
Generate the terrain in 2048 or 4096 pixels size if you want to use it in the foreground. Use the 16 bit tiff export format (the last one of the list) for the terrain file. This format is only available in Geocontrol 2.
Exporting the selectors
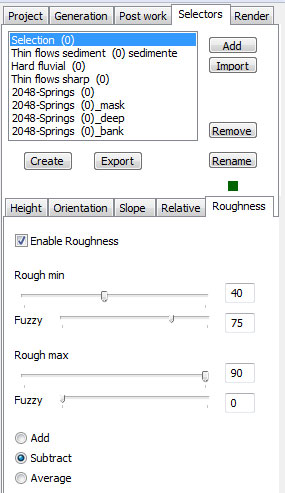
This view shows the selectors panel of Geocontrol. Selectors allow you to accurately select (hence their name) parts of the terrain. Geocontrol has interesting selectors based on factors unavailable in Vue:
- Roughness. This selector is very useful to select areas where you will place rock materials in Vue.
- Erosion (in this case: thin flows sediment and hard fluvial). These selectors typically create beautiful flow patterns. They define areas where the ground cover is eroded by rain.
- Springs. These selectors define the areas where rivers and lakes are. Make sure you use the water filled river type when you create them in Geocontrol.
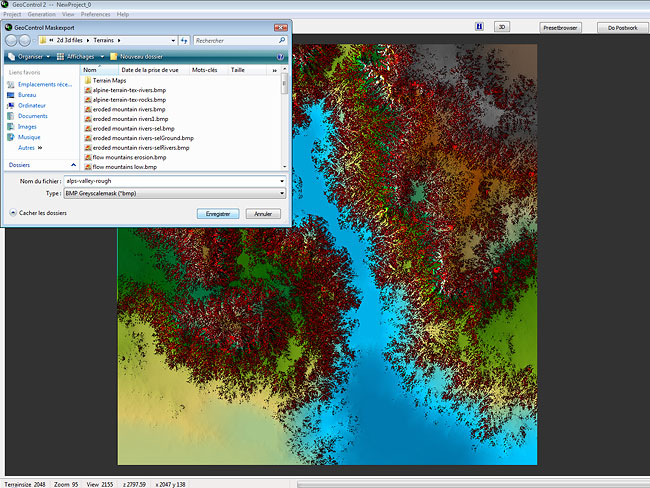
I have exported 4 selectors for this terrain: roughness, flows, fluvial and rivers. Working with selectors is a two step process: you have to create them first. They will be highligted in red in the view from above. You may then export them.
A few more tips:
- You may need to fiddle a bit with parameters to get exactly what you want for roughness. The settings I used are in the screen capture above.
- I used the _mask selector for the rivers this time, but generally the _deep one works well and gives a smoother transition between earth and water.
Creating the terrain in Vue
If you have Geocontrol 2, you should now have the exported terrain file and selectors. If you do not, download the alps-valley.zip file and unzip it.
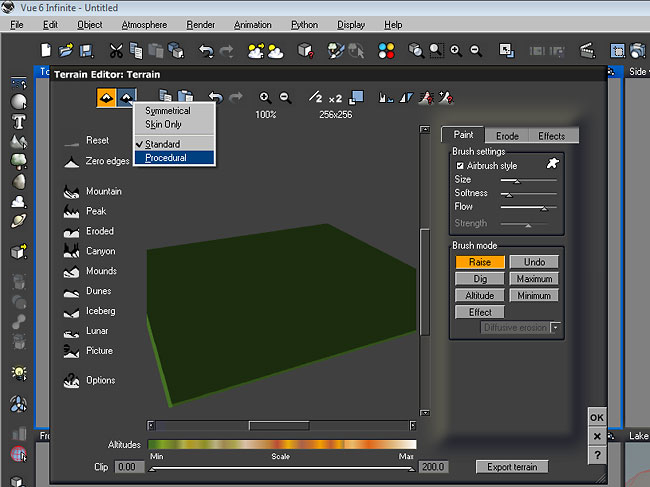
Start Vue with an empty scene and create a simple terrain. Edit the terrain (ctrl+e) and make sure it is 256x256 pixels (not larger). Then switch to a procedural terrain. This type of terrain renders more slowly than classic ones, but they are currently the only way to preserve the high level of details Geocontrol produces.
Once you have changed terrain type, you will see a new tab appear in the right hand side (proc.). Click it to access the texture selector.
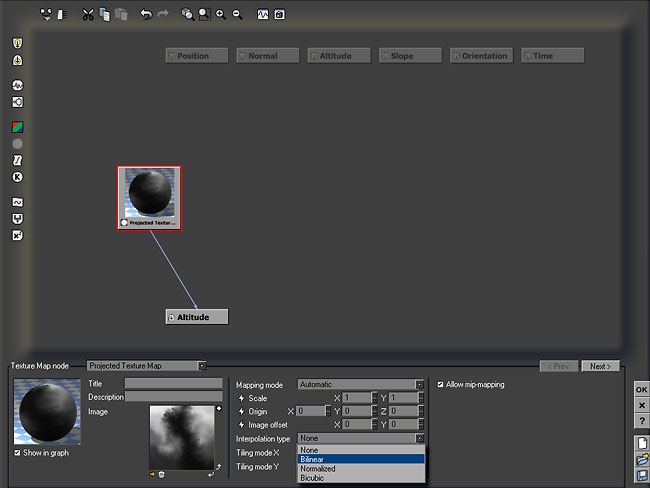
Right click the altitude production sphere to open the function editor. Once there, click in the blank area above the altitude marker. Click on the button at the left that calls a bitmap file (greyed out in the screen capture). Load the terrain tiff file you have created (or the Alps-valley.tif file from the zip) as a projected texture map. Keep the automatic mapping mode but change the interpolation type to bilinear or you will get level lines in your terrain. Validate and you will see the terrain preview appear.
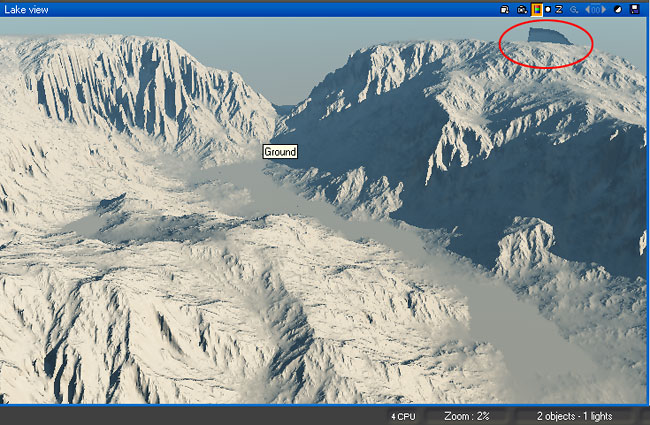
Click ok to go back to the main view and examine your terrain. You should normally see a strange "wall" in one end of it. This is a Vue bug that happens very often when your terrain has low edges. To correct it, edit your terrain again.

Set the terrain scale to 1.01. Validate, close the terrain editor and the wall should have disappeared. You should now be able to use your terrain normally. Zoom it to see how close you can get before starting to lose details and prepare for the next step: giving it a nice texture!
You can access the second part of the tutorial here